Estes Camroc (1966)
The Estes Camroc was the first commercially produced camera designed to be carried aloft by a model rocket
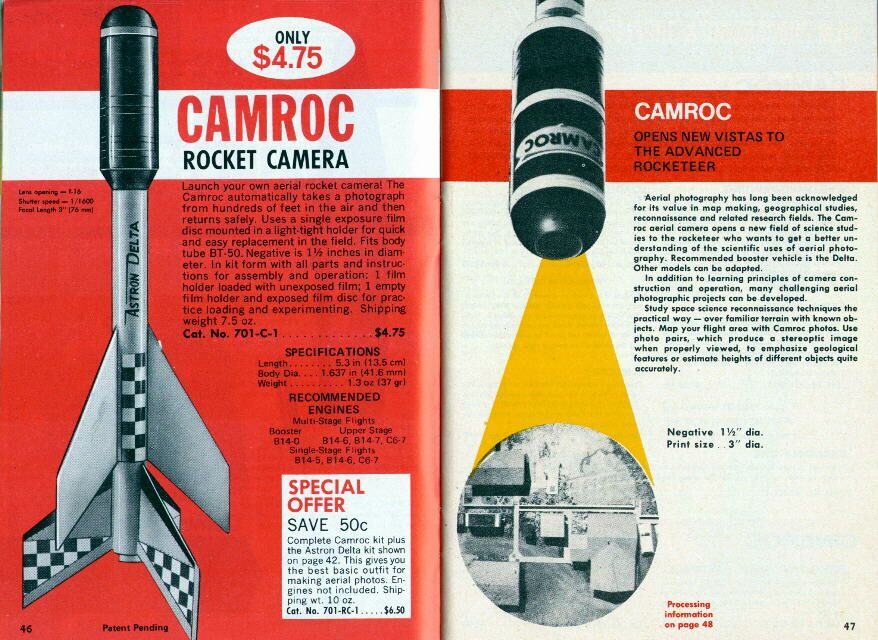
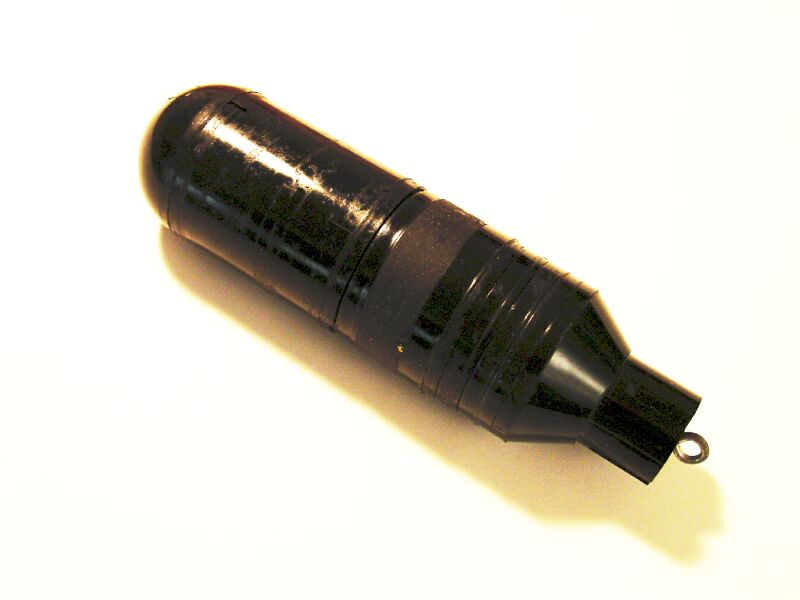
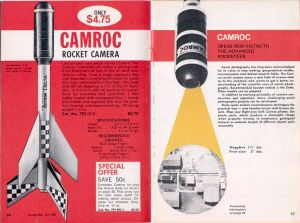
The Camroc was a marvel in simplicity with only one moving part: the shutter. It took one shot per flight using special disks of film loaded prior to launch. The shutter was tripped when the ejection charge fired to release the parachute. The idea was to use a rocket engine with enough of a delay between launch and parachute deployment to ensure that the rocket was in a nose-down attitude when the shutter fired, thereby obtaining a shot of the ground below. (catalog photo from www.ninfinger.org)
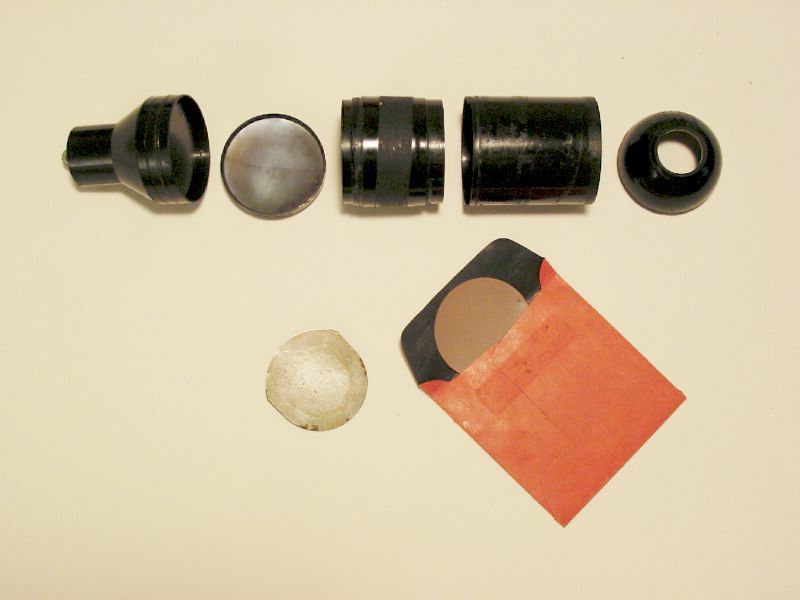
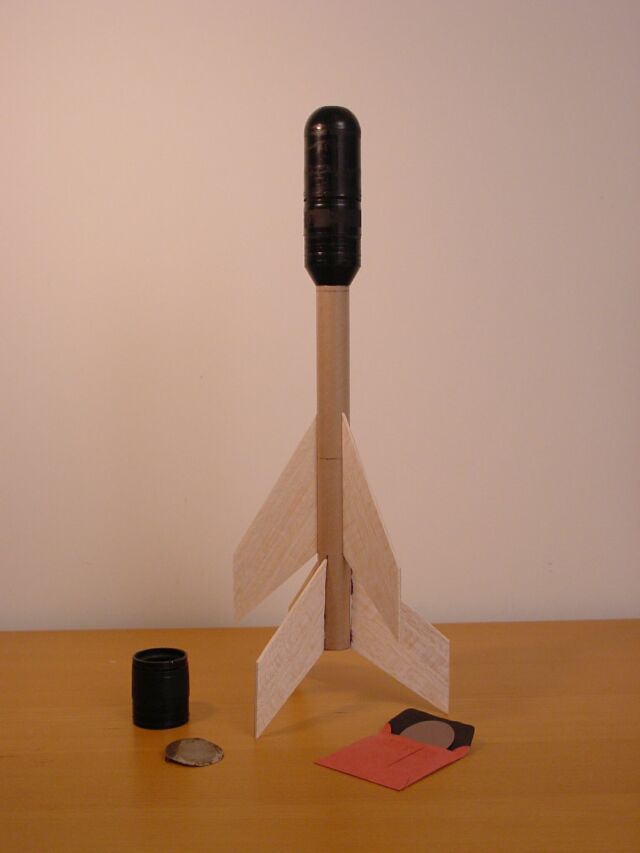
At the far left is my Camroc in disassembled form, along with an unused (but exposed) film disk in its light-proof envelope. Next to the envelope is the metal “slide” that was removed from the camera just prior to launch. The picture at the not-so-far left is from the instruction manual and clearly labels each part

The film disks were approximately 1.5 inches in diameter. It was ASA 400 film that needed to be “pushed” to ASA 1200 through extended processing times. Using readily available photo processing chemicals and a darkroom, a hobbyist could process the film. Or, the film could be sent to Estes for processing.
On left is a close-up of the lens from the side facing the film plane. On the right is the other side of the same section showing the shutter spring (rubber band) pins and the aperture of the shutter in the “open” position. The shutter was held in the cocked position with a string that went under the camera body at the narrow end that went into the rocket body. When the parachute was deployed, the camera separated from the rocket, releasing the string thereby releasing the shutter.
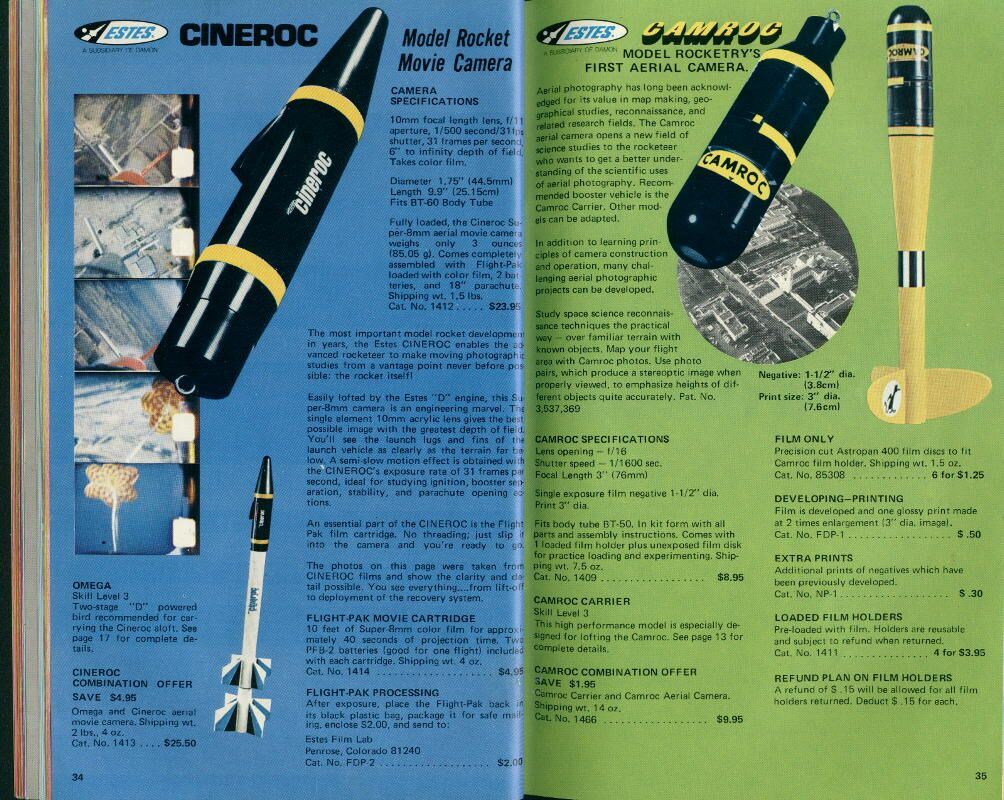
This is another catalogue shot showing the Camroc along with its sister photographic payload, the Cineroc movie camera. There is also a picture of the Estes Camroc Carrier rocket (catalog photo from www.ninfinger.org)
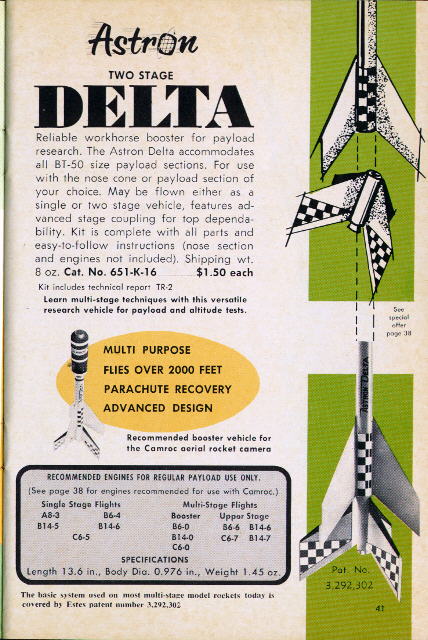
This is my attempt to make an Astron Delta clone. This was a two-stage rocket that was recommended by Estes as the carrier of the Camroc. This was prior to the introduction of the Camroc Carrier rocket above. (catalog photo from www.ninfinger.org)
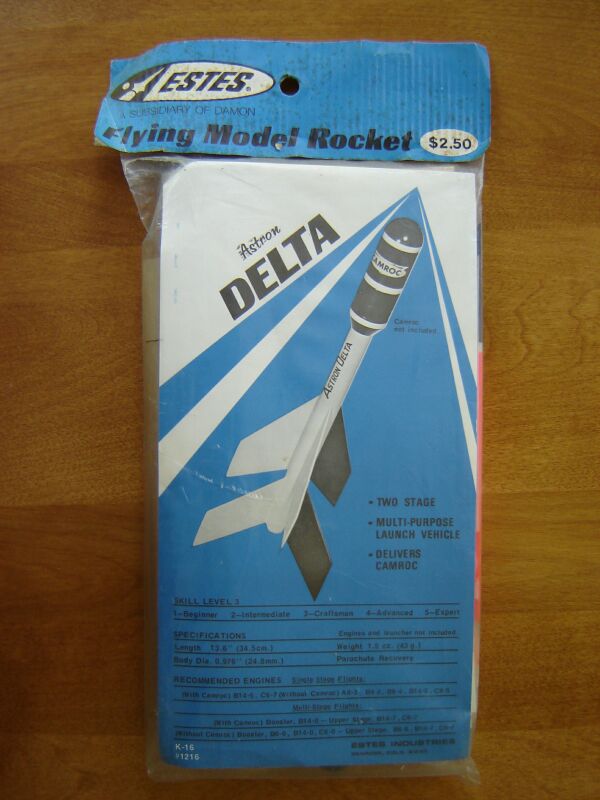

This is I real Astron Delta recently found in an old-time hobby shop. The original price is $2.50. One sold on ebay recently for over $100!

September 17, 2010: This Camroc probably hasn’t snapped a photo in 40+ years. Was it up to the challenge this many years later? To answer this burning question, our Camroc needed a little TLC to get some obvious repairs made.

First, there is the rubber band powered shutter. In flight, the shutter is snapped open and closed by a small rubber band. After 40+ years, the original rubber band has gone missing. Even if it had remained, it would likely need replacing due to a common case of dry rot. A bag of #9 rubber bands from any office supply house will do the trick. Secondly, some fresh tape to hold all of the Camroc sections together. I used a combination of black and yellow electrical tapes to do the job. The yellow tape is not required, since the black can be used , but the yellow gives the Camroc that factory-original appearance.
The circular film. Hmmm, this is a tough one. I can’t get it from Estes these days, since the Camroc went out of production in the 1970’s. I’ll have to make my own. The original Estes Camroc film disk was a 1-9/16 inch disk of ISO 400 film of unknown origin. I can use modern sheet film (used for medium and large format photography using a view camera) and try cutting out the disk manually somehow. I could try doing it with scissors, but I’d have to do it in total darkness, and I’m guessing that a perfect circle under those circumstances would be unachievable.

The next best thing is this 1-1/2 inch hole punch from Ek Success. Unfortunately, there is no 1-9/16 inch hole punch out there (that I know), so I’m going to have to make some modifications to the Camroc’s film holder to use the smaller disk.

First was the area behind the lens. Using the computer, I drew to circles, one at 1-9/16 inch in diameter, the other at 1-1/2 inch. I lined them up on edge and printed them out. This would give me a pattern for circular, crescent-shaped “lip” to hold the film in place from the front. I glued the pattern to some thin sheet styrene plastic (1/16 inch) and was able to cut the crescent shape out with scissors. I then used CA “instant” glue to glue the crescent to the back of the lens section.

You can see the plastic “crescent” glued in place behind the lens section. The thin plastic can be easily shaped in place once mounted by using a hobby knife to “shave” off excess material and get a good “arc”. To hold the film in place from the back, I modified the film holder with these plastic strips glued in place and lined up with the film holder’s original retainer lip. These two modifications gave the smaller film disk something to rest between and secure it during flight operations.
I purchased some Ilford HP5 Plus ISO 400 black-and-white film in a pack of 25 4×5 sheets. This along with the hole punch should give me plenty of film disks.
The moment of truth. I cut myself a few film disks, and after fumbling around in the dark, managed to get a few loaded for some sample pics. The Camroc only shoots one photo per launch, so a new disk must be loaded after each flight.

In order to do this at the launch site, you’ll need a film changing bag. This is essentially a black, light-proof bag you can stick your film items in, put your hands through two tight fitting holes in the bag, and perform various tasks that would otherwise need to be done in a darkroom.

Here is a paper 1-1/2 inch disk sitting in my modified holder. It’s essentially pushed to one side a little off center. Trying to center it is nearly impossible given the holder design. It would be far more effort to come up with such a modification than it was to simply put it off center.

Success! These are some test shots I took on the ground of my house. I processed them at home using readily available black and white processing chemicals. The exposure seems correct, so it looks like the #9 rubber bands are the perfect replacement for the original. The photos are fairly sharp, so I know my modified film holder is doing its job. I have to say, the photos are actually sharper than I expected. The single element plastic lens of the Camroc seems to be better than that of the early Astrocam. Only the latest Astrocams seem to be on par.
I am currently constructing an Estes Camroc Carrier clone using parts (including laser-cut fins) from Semroc. Semroc is a good source for discontinued model rocketry kit parts.

Time to fly. It was a beautiful fall day here – sunny and a tad chilly at 50’F – great for the Camroc and newly-built Camroc Carrier clone model rocket. Armed with a half-dozen film disks and Estes C6-5 engines, I was looking forward to a visit into model rocketry’s past. The wind was a touch high today, but the sun was shining bright, we had a very large field over in Ivyland, PA, and my friends, Scott and Justin, were also there to launch some of Scott’s rockets. I had only brought my Camroc and I expected that to occupy my time fully with launch prep, launching, recovery and reloading with film. Film reloading is an interesting chore, and has to be done in total darkness. The only way to do this at the flight field is in a light-tight film changing bag. The changing bag is black, light-proof treated fabric bag with two holes to insert your arms through and perform the film changing.
I spent the better part of the week finishing the Camroc Carrier, built from a collection of reproduction parts from Semroc rocketry, and while it was indeed a rush job to get it ready for launch day, it still turned out presentably.


I launched the Camroc seven times, and all seven launches were successful. I was feeling pretty good at the end of the day!
Unfortunately, that’s were the good feelings ended. Later on that night, I processed the film and was disappointed to find that no usable images were captured. Here is a sample of four of the negatives:

All of them are over-exposed. It seems as though there was some light leakage somewhere, either in the Camroc, or the light changing bag or both. It could also be that the shutter is not closing quickly enough. When I took test photos about two months ago, the tests were fairly controlled in that the film was loaded inside the house in dark storage room in the basement, and the rocket didn’t spend more than a few minutes outdoors while I took the shots.
So, it’s back to the drawing board to do some more tests to look for light leakage and/or a malfunctioning shutter. That is all for now. Fooey.
[wordbay]estes camroc[/wordbay]
Originally posted 2015-05-30 13:31:23.
Did you ever get this working? Hate those cliff hangers! mcb
Hi Mike, winter put a damper on any further launches, but as it warms up, I will definitely launch again. I think the problem was with using the film changing bag. Out in bright sunlight, I don’t think it seals out the light well enough.
Excellent! This is a very well written article. I was given a used Camroc years ago and have been thinking about getting it going again and this article is very motivating.
I was going to ask if you “pushed” the processing? That might have resulted in clear negatives but you would have at least had some image. Your diagnosis seems right on.
Could you share what engine you launched with?
I worked at Royal Electronics in Denver several years as a tech and Mike Dorffler did some circuit design for us. He developed the Camroc. I actually flew a cineroc in one of my RC planes!
Mike Berry, Grand Junction, CO
I used C6-5’s when launching since they generally yield horizon shots. I did push the film about two f-stops. I’m pretty convinced the negatives were fogged in the changing bag due to some mishandling on my part. Neat story about Mike Dorffler. The Cineroc was an ingenius design.
Camroc Carrier: Found the fins but what about that tapered body tube? Does seem like an unlikely design but I guess I lean towards simple. I like your C6-5 idea as it would present less recovery problems.
The tapered body tube is just a regular body tube, with a fairing formed out of heavy paper. I used clear transparency film instead (takes paint better and it’s light and durable). You can get the template for the fairing, as well as reproduction fins, body tube, etc., from Semroc here: http://www.semroc.com/Store/scripts/ClassicParts.asp?ID=109. There is also a link on that web page for the Camroc Carrier assembly instructions, which has a template for the fairing.
I remember my camroc experiences well from the 60-70s. Sometimes the camera didnt have enough time to face ground, I always tried to get a longer delay,B6-12 or something, its been awhile. I was developing my own film and got to the point of cuting the film by hand…………………not the roundest but worked fine. My own darkroom made ok presention photos. LOTs of Fun!
As it turns out I still own my unpainted origional cameroc………..It looks better now on top of a desk! JimK
how much is your circular punch 1 1/2 inch diameter?
The punch is made by EK Success (google it). I don’t recall how much it costs, but I believe I got it at Staples office supply store.
How did you confirm that the emulsion side of the film was facing the lens ?
cutting my own response……………..If my memory servers me right when you opened a box of film in the dark it had notches in a specific corner (right facing?) location that let you know what side is up. jimk
Yes, there is the notch, but once you cut the circles out of the film, the emulsion side notch reference is lost, so you have to be sure the circles didn’t unknowingly flip on you. For me, the circle cutter hole punch left a distinctive slight raised rough edge on one side of the film after the cut. Assuming that one remembers the orientation of the emulsion when placing the sheet in the hole puncher, the cut edge would indicate what side was ‘up’ vs. ‘down’ as it went through the punch. As a side note, the emulsion side is usually facing down when opening the box of film normally.
The recommended engine for the Camroc carrier (and Astrocam 110) is the C6-7, so it will be pointing down. Pointing up, you get pictures of the sky.
I still have my Camroc from years ago, and am building a clone Camroc carrier from body tubes and balsa sheet.
Years ago, I cut a 1 9/16 inch aluminum disk, and used that to cut around Tri-X roll film. I don’t have the disk or film anymore, though. It isn’t so hard to hand cut them in a darkroom, changing bag would be harder. Curl tells which way the emulsion goes.
I hope to get my Camroc going again, and also I now have an Astrocam 110 (and still in the fridge, rolls of 110 film). And C6-7 engines!
Yes, C6-7’s are recommended for the Astrocam and Camroc, but when it comes to the Astrocam, ALL of my Astrocam pictures on this website were taken with C6-5’s. Why? Estes engine recommendations for the ORIGINAL Astrocam were BOTH a C6-7 or a C6-5, the latter suggested by Estes in order to lessen the downward angle of the camera, thereby including more distant objects in the shot. I preferred this orientation rather than having the camera pointed more steeply down. Down often yielded pictures of the launch field with a boring patch of grass taking up the majority of the photo content. Having the camera oriented in a more shallow attitude offered more interesting subject material, like nearby neighborhoods, roads, lakes, etc. The same was true for the current generation of Astrocam despite the C6-7 recommendation, as witnessed by my Astrocam photos on this website – ALL taken with C6-5’s (http://www.rcgrabbag.com/archives/estes-astrocam-1979). I used the same experience for the Camroc, which made sense to me. I highly doubt the additional 2 seconds could mean the difference between all sky and all ground in the shot, but I could be wrong. As far as the film emulsion, sheet film (as well as photographic paper) is packaged with the emulsion side down in relation to the lid of the box. This is fine except that one still needs a method to orient the film if it gets flipped after cutting, since working in the dark, or a changing bag, can result in some fumbling. For me, the circular punch that I used put a distinct rough edge on the downward facing side of the film, so if I knew the emulsion was facing down when cutting, then the emulsion side would have the rough edge as well. All the cutting I did was done in a darkroom. Loading was done in the changing bag.
The Astrocam 110s that I have all say C6-7 only.
For the Camroc, I remember using the B14 engines.
I only remember doing a single stage flight, I believe with a B14-6.
I now see a page for the Astron Delta recommending B14-5 or C6-7 with the Camroc single stage. The only booster for two stage Delta-Camroc is B14-0.
I built a new Delta from my original plans, to go with the
Camroc I still have from years ago.
But I might fly my recently bought, and not yet assembled,
Astrocam 110 first. (I have some rolls of 110 film to go with it.)
As well as I know, there is some uncertainty in the timing of the
delay charge, so some flights might go off a little early.
Glen, have a look at the Estes 1979 catalog featuring the Astrocam. Note at the top of the page “Recommended engines C6-5, C6-7”, and then further down in the description: “Launch with C6-5 or C6-7 engine”. http://www.ninfinger.org/rockets/catalogs/estes79/79estcov.html
Great articles on the Camroc! Brings back alot of fond memories even though i never had one but the neighbor kid did! Hopefully one will come up on ebay on day. Lol
Been looking for camroc camera housing shell for a display rocket.
Nice update. You should try a longer delay engine.
Hi There,
My partner recently discovered a photograph I had from 1967 from my CAMROC “Rocket Camera”.
https://flic.kr/p/2qYE6Hw This Flickr link will take you to it. The rocket was launched from the local school football field. I was fortunate that my step father operated the local “Esterhazy Miner” newspaper and taught me how to develop film and make prints. So I took the negative from the CAMROC and this was the result. I thought it was lost for all time. Feel free to post the image on the site, with my name attached. I have moved SO MANY TIMES chasing work back and forth across Canada that the rocket was lost in the shuffle. It was such an amazing effort for a 13-14 year old to pull this off AND develop the film and print it. I was so excited by the project. I am in the last years of my latest career, helping to design and develop safety software for dispatching helicopters, so the “aviation” theme carried on all my life.
Oh, an addendum to my earlier post. later in life I learned how to do aerial photo interpretation and to calculate altitude once you know the camera characteristics. My notes are gone, but I recall it was at an altitude above the ground, of 1140 feet.